FREE Custom PC Build Quotes
• Receive a personalized parts list and ready-to-order quote within
24–48 business hours.
Request Yours →
FREE Custom PC Quote →

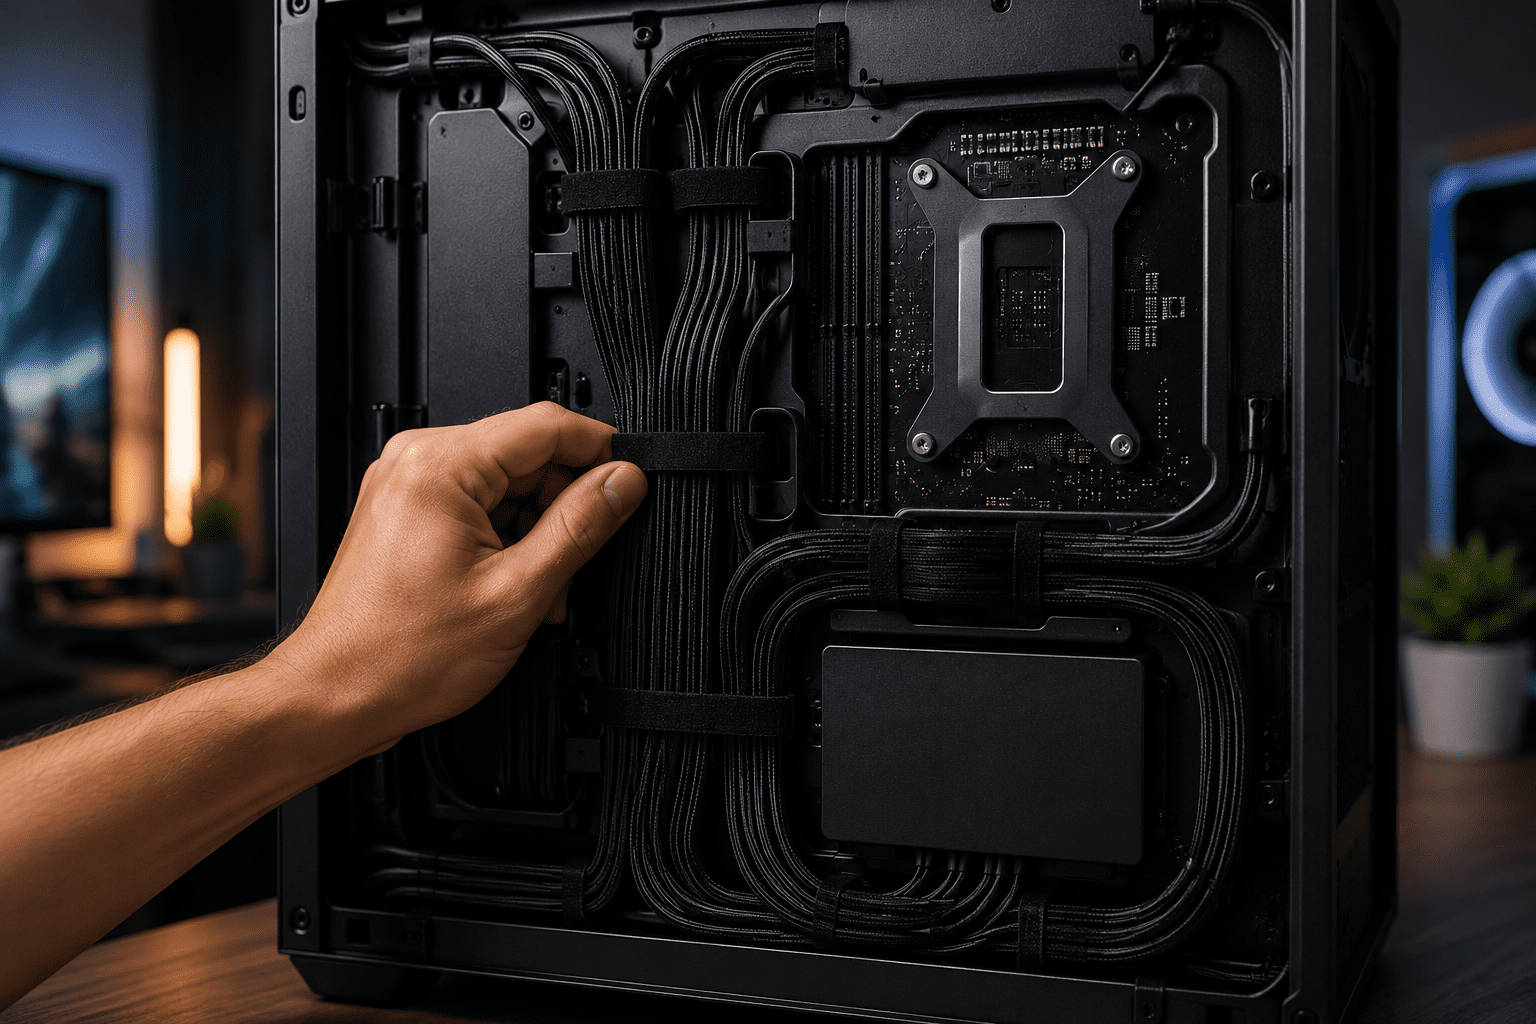
10 Cable Management Tips for a Cleaner Gaming Setup
A clean gaming setup is not just about looking good for pictures. Good cable management makes your desk easier to use, safer to clean, better for upgrades, and more enjoyable every time you sit down to play, work, stream, or study.
The problem is that most setups do not become messy overnight. It usually starts with one monitor cable, then a keyboard cable, mouse cable, headset cable, charger, speakers, RGB controller, Ethernet cable, capture card, and suddenly the entire desk looks like it has a spider web behind it.
The good news? You do not need a huge budget to fix it. You just need a plan. Here are 10 practical cable management tips you can use to make your gaming setup cleaner, easier to maintain, and more professional.
Before you start: Take one photo of your setup from the front and one from behind the desk. This gives you a clear before picture and helps you see where the biggest problems are.
Tip 1
Start by unplugging and sorting every cable
The biggest mistake people make is trying to organize cables while everything is still plugged in. That usually leads to wrapping cables around each other without solving the real problem.
Start by unplugging what you safely can, then separate your cables by category:
- Power cables
- Monitor cables
- USB cables
- Audio cables
- Ethernet cables
- Charging cables
- RGB or controller cables
Once you know what each cable does, it becomes much easier to decide where it should go.
Tip 2
Use the shortest cable that still gives you flexibility
Extra cable length is one of the main reasons a desk gets messy. A 10-foot cable may work, but if the device is only two feet away, the leftover length has to go somewhere.
For a cleaner gaming setup, use cables that are long enough to reach comfortably, but not so long that you have to hide a huge loop behind the desk. If you already have long cables, coil the extra length neatly and secure it with Velcro straps.
Tip 3
Mount your power strip under the desk
Leaving the power strip on the floor usually creates the messiest part of the setup. It also makes cleaning harder and increases the chance of accidentally kicking or pulling cables.
One of the easiest ways to improve desk cable management is by mounting your power strip underneath the desk. This keeps most power cables hidden and gives your setup a central power hub.
Just make sure the power strip is secure, easy to reach, and not overloaded.
Tip 4
Use Velcro straps instead of zip ties
Zip ties look clean at first, but they are annoying when you need to change something later. If you upgrade your monitor, move your PC, add a microphone, or swap a keyboard, you may have to cut everything apart.
Velcro straps are better for most cable management projects because they are reusable, adjustable, and safer for cables. They let you keep everything tight without making future upgrades difficult.
Tip 5
Separate power cables from display and USB cables
A clean gaming setup should not just look organized. It should also be easy to troubleshoot. If every cable is wrapped together, finding one bad cable later becomes frustrating.
Try to keep power cables on one route and USB, display, and audio cables on another. This makes the setup easier to maintain and helps you quickly identify what needs to be unplugged when you upgrade or move equipment.
Tip 6
Route cables based on where your devices actually sit
Do not organize your cables randomly. Build the layout around your actual desk setup.
Your monitor cables should route toward the back center of the desk. Keyboard and mouse cables should move toward the nearest clean path without dragging across your mousepad. Headset, microphone, camera, and controller cables should have enough slack to move comfortably without pulling.
This is where a lot of setups go wrong: they look clean for photos but become uncomfortable to use. Good cable management should make your gaming setup cleaner and easier to live with.
Tip 7
Desk Cable Management: Add a Cable Tray Under the Desk
A cable tray is one of the best upgrades for desk cable management. It gives extra cable length, adapters, power bricks, and USB hubs a place to sit instead of hanging behind your desk.
Good desk cable management makes cleaning easier and prevents cables from becoming tangled over time. This is especially helpful if you have multiple monitors, a standing desk, speakers, streaming equipment, RGB lighting, or lots of chargers.
Tip 8
Use cable clips for the items you plug in often
Not every cable should be hidden forever. Phone chargers, controller cables, headset chargers, and USB-C cables are usually used often. If you hide them too much, they become annoying to access.
Use small cable clips on the edge or underside of the desk to keep these cables available without letting them fall to the floor.
Tip 9
Do not forget comfort and monitor placement
A clean desk is great, but your gaming setup should also feel good to use. Your monitor should be positioned in front of you so you are not constantly turning your head or sitting awkwardly.
OSHA recommends positioning your monitor directly in front of you and setting up your workstation in a way that reduces awkward posture. Learn more from OSHA’s workstation guide.
Tip 10
Leave room for future upgrades
Your gaming setup will probably change over time. You may add a second monitor, a better keyboard, a microphone arm, speakers, a capture card, or a new gaming PC.
That is why the best cable management is clean but not permanent. Avoid making everything so tight that one small upgrade forces you to redo the entire setup. Leave a little slack where movement is needed, label important cables, and keep your layout easy to update.
Want a cleaner setup without doing all the work?
DkBuildsPC helps with custom gaming PCs, setup makeovers, cable management, Windows installation, optimization, and full gaming setup service options in the Orlando area.
Desk Cable Management Checklist
- Unplug and sort cables before organizing.
- Use shorter cables when possible.
- Mount the power strip under the desk.
- Use Velcro straps instead of zip ties.
- Separate power cables from USB, audio, and display cables.
- Add a cable tray for power bricks and extra length.
- Use clips for cables you grab often.
- Keep your monitor and accessories comfortable to use.
- Leave room for future upgrades.
FAQ: Cable Management for Gaming Setups
Is cable management only for looks?
No. Cable management improves the look of your setup, but it also makes cleaning easier, reduces cable stress, helps with troubleshooting, and makes future upgrades simpler. Whether you have a budget gaming setup or a high-end battlestation, proper cable management improves both appearance and usability.
What is the best cable management tool?
For most people, improving desk cable management starts with Velcro straps, cable clips, and an under-desk cable tray. These are affordable and work for most gaming setup layouts.
Can DkBuildsPC help with a full setup makeover?
Yes. DkBuildsPC can help with cable management, PC setup, Windows installation, monitor setup, peripherals, optimization, and full setup makeovers. If you want your setup to look cleaner and work better, contact us to schedule a service.